The Flooring Expert
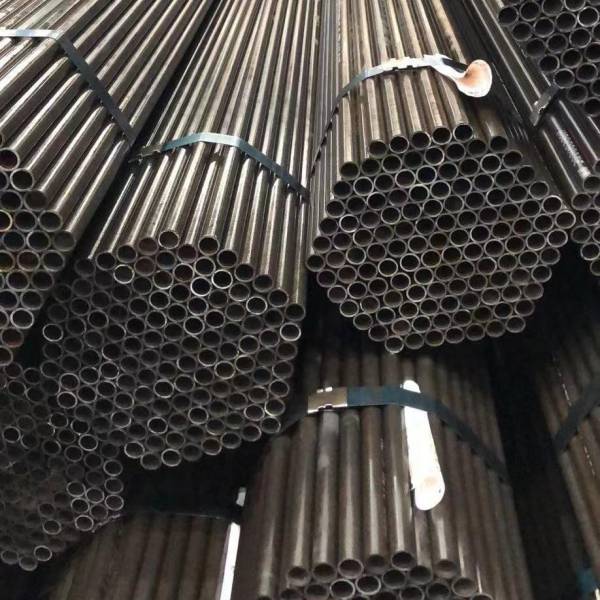
Seamless Alloy Steel Boiler Pipes Superheater alloy pipes Heat Exchanger Tubes
| Standard: ASTM SA 213 | Alloy Or Not: Alloy |
| Grade Group: T5,T9,T11,T22 etc | Application: Boiler Pipe/ heat exchanger pipe |
| Thickness: 0.4-12.7 mm | Surface Treatment: As customer’s requirement |
| Outer Diameter(Round): 3.2-127 mm | Technique: Hot Rolled |
| Length: Fixed length or random length | Heat treatment: Normalizing/Tempering/Annealing |
| Section Shape: Round | Special Pipe: Thick Wall Pipe |
| Place of Origin: China | Usage: Super heat, Boiler and Heat Exchanger |
| Certification: ISO9001:2008 | Test: ECT/UT |
It is mainly used to make high-quality alloy steel pipe for high pressure boiler pipe, heat exchanger pipe and super heat pipe
Grade of high-quality Alloy steel: T2,T12,T11,T22, T91, T92 etc.
| Steel Grade | Chemical Composition% | ||||||||||
| C | Si | Mn | P, S Max | Cr | Mo | Ni Max | V | Al Max | W | B | |
| T2 | 0.10~0.20 | 0.10~0.30 | 0.30~0.61 | 0.025 | 0.50~0.81 | 0.44~0.65 | – | – | – | – | – |
| T11 | 0.05~0.15 | 0.50~1.00 | 0.30~0.60 | 0.025 | 1.00~1.50 | 0.44~0.65 | – | – | – | – | – |
| T12 | 0.05~0.15 | Max 0.5 | 0.30~0.61 | 0.025 | 0.80~1.25 | 0.44~0.65 | – | – | – | – | – |
| T22 | 0.05~0.15 | Max 0.5 | 0.30~0.60 | 0.025 | 1.90~2.60 | 0.87~1.13 | – | – | – | – | – |
| T91 | 0.07~0.14 | 0.20~0.50 | 0.30~0.60 | 0.02 | 8.0~9.5 | 0.85~1.05 | 0.4 | 0.18~0.25 | 0.015 | – | – |
| T92 | 0.07~0.13 | Max 0.5 | 0.30~0.60 | 0.02 | 8.5~9.5 | 0.30~0.60 | 0.4 | 0.15~0.25 | 0.015 | 1.50~2.00 | 0.001~0.006 |
For T91 other than above also includes Nickel 0.4, Va 0.18-0.25, Ni 0.06-0.10, Ni 0.03-0.07, Al 0.02, Ti 0.01, Zr 0.01. A Maximum, unless range or minimum is indicated. Where ellipses (…) appear in this table, there is no requirement, and analysis for the element need not be determined or reported. B It is permissible to order T2 and T12 with a sulfur content of 0.045 max. C Alternatively, in lieu of this ratio minimum, the material shall have a minimum hardness of 275 HV in the hardened condition, defined as after austenitizing and cooling to room temperature but prior to tempering. Hardness testing shall be performed at mid-thickness of the product. Hardness test frequency shall be two samples of product per heat treatment lot and the hardness testing results shall be reported on the material test report.
| Steel Grade | Mechanical Properties | |||
| T. S | Y. P | Elongation | Hardness | |
| T2 | ≥ 415MPa | ≥ 205MPa | ≥ 30% | 163HBW(85HRB) |
| T11 | ≥ 415MPa | ≥ 205MPa | ≥ 30% | 163HBW(85HRB) |
| T12 | ≥ 415MPa | ≥ 220MPa | ≥ 30% | 163HBW(85HRB) |
| T22 | ≥ 415MPa | ≥ 205MPa | ≥ 30% | 163HBW(85HRB) |
| T91 | ≥ 585MPa | ≥ 415MPa | ≥ 20% | 250HBW(25HRB) |
| T92 | ≥ 620MPa | ≥ 440MPa | ≥ 20% | 250HBW(25HRB) |
Permitted Variations in Wall thickness
| Wallthickess % | |||||
| outside diameter in. mm |
0.095 2.4 and under |
over0.095 to 0.15 2.4-3.8 incl. |
over 0.15 to 0.18 3.8-4.6 incl |
over 0.18 to 4.6 |
|
| over under over under over under over under | |||||
| seamless, hot finished | |||||
| 4inch and under 40 0 35 0 33 0 28 0 | |||||
| over 4 inch .. .. 35 0 33 0 28 0 | |||||
| seamless, cold finished | |||||
| over under | |||||
| 11/2 and under | 20 0 | ||||
| over 11/2 | 22 0 | ||||
The permitted variations in wall thickness apply only to tube , except internal-upset tubes, as rolled or cold finished
and before swaging,expanding ,bending,polishing,or other fabricating operations
Permitted Variations in Outside Diameter
| outside diameter (mm) | Pemitted Variation( mm) | |
| hot finished seamless tube | over | under |
| 4″ (100mm)and under | 0.4 | 0.8 |
| 4-71/2″(100-200mm) | 0.4 | 1.2 |
| 71/2-9“(200-225) | 0.4 | 1.6 |
| Welded tubes and cold finished seamless tubes | ||
| under1″(25mm) | 0.1 | 0.11 |
| 1-11/2″(25-40mm) | 0.15 | 0.15 |
| 11/2-2″(40-50mm) | 0.2 | 0.2 |
| 2-21/2″(50-65mm) | 0.25 | 0.25 |
| 21/2-3″(65-75mm) | 0.3 | 0.3 |
| 3-4″(75-100mm) | 0.38 | 0.38 |
| 4-71/2″(100-200mm) | 0.38 | 0.64 |
| 71/2-9“(200-225) | 0.38 | 1.14 |
Hydraustatic Test:
The Steel Pipe Should Be Tested Hydraulically One By One. The Maximum Test Pressure Is 20 MPa. Under The Test Pressure, The Stabilization Time Should Be Not Less Than 10 S, And The Steel Pipe Should Not Leak. Or The Hydraulic Test Can Be Replaced By Eddy Current Testing Or Magnetic Flux Leakage Testing.
Nondestructive Test:
Pipes That Require More Inspection Should Be Ultrasonically Inspected One By One. After The Negotiation Requires The Consent Of The Party And Is Specified In The Contract, Other Non-Destructive Testing Can Be Added.
Flattening Test:
Tubes With An Outer Diameter Greater Than 22 Mm Shall Be Subjected To A Flattening Test. No Visible Delamination, White Spots, Or Impurities Should Occur During The Entire Experiment.
Hardness Test:
For Pipe Of Grades P91, P92, P122, And P911, Brinell, Vickers, Or Rockwell Hardness Tests Shall Be Made On A Specimen From Each Lot
GB/T5310-2017
ASME SA-106/SA-106M-2015
ASTMA210(A210M)-2012
ASME SA-213/SA-213M
ASTM A335/A335M-2018
Products categories
WHY CHOOSE US
Since its establishment, our factory has been developing first world class products with adhering the principle
of quality first. Our products have gained excellent reputation in the industry and valuabletrusty among new and old customers..
